Pods
This document explains how to operate Pods through kop.
Binding keys
Available shortcuts for Pod-related operations are shown in the Footer area at the bottom of the page. Available actions may vary slightly by context; always use the real-time prompts in the Footer as the source of truth.
| Key | Action |
|---|---|
a |
Attach to Pod |
c |
Create Pods |
d |
Delete Pod |
e |
Edit Pod |
t |
Transfer files |
f |
Port Forward |
l |
Pod Logs |
n |
Next Page |
p |
Previous Page |
s |
Pod Shell |
Some
keysare shown in the Footer only under specific conditions. For example,nandpare displayed only when the total number of resources exceeds the current screen height.
Actions
The following sections describe what each action does and how to use it.
Attach to Pod
Attach connects to the stdin/stdout stream of the container's running main process, which is useful for observing real-time output from interactive programs.
Steps:
- In the left resource navigator, go to
Pods. - Select the target Pod in the list.
- Press
ato open an Attach session. - Press
ESCto exit the session.
Notes:
- This action requires a running process inside the container.
- Difference from
Pod Logs:Attachis for live process streams, whileLogsis for log viewing.
Attachopens in theAction Workspace. See Action Workspace for details.
Create Pods
Creates a new Pod resource in the current namespace.
Steps:
- In the left navigation, move the cursor to
Podsor enter thePodsresource page. - Press
cto open the create view. - Fill in or paste the resource YAML.
- Submit and wait for creation feedback.
Recommendations:
- Confirm the current namespace before creating.
- If no namespace is specified, the default namespace is
default. - For long-running workloads, prefer controllers such as Deployment. Creating Pods directly is better for temporary debugging or one-off tasks.
Create Podsopens in theAction Workspace.
Delete Pod
Deletes the currently selected Pod resource.
Steps:
- Select the target Pod in the
Podslist. - Press
dto trigger deletion. - Confirm the action in the prompt.
Notes:
- The Pod is terminated immediately after deletion.
- If the Pod is managed by controllers such as Deployment, StatefulSet, or DaemonSet, a new Pod is usually recreated automatically.
Edit Pod
Edits the Pod YAML configuration and submits changes.
Steps:
- Select the target Pod.
- Press
eto open the YAML editor view. - Modify the content and save to submit.
Notes:
- Not all fields can be updated online. Changes to immutable fields are rejected by the Kubernetes API.
- If an update fails, adjust based on the error message and retry.
Edit Podopens in theAction Workspace.
Transfer Files
Transfer files allows users to transfer files between their local machine and their pod.
The
Transfer filesfunction requires the container to contain thetarutility; otherwise, it will not be able to transfer directories and only supports transferring single files.
Steps:
- In the left navigation, move the cursor to
Podsor enter thePodsresource page. - Move the cursor to the target pod
- Press the
tkey to open the Transfer dialog box.(If your pod contains multiple containers, please select one container.) - In the
Transferdialog box, select the source file and destination path for this transfer. - Click the
Transferbutton to start the transfer.
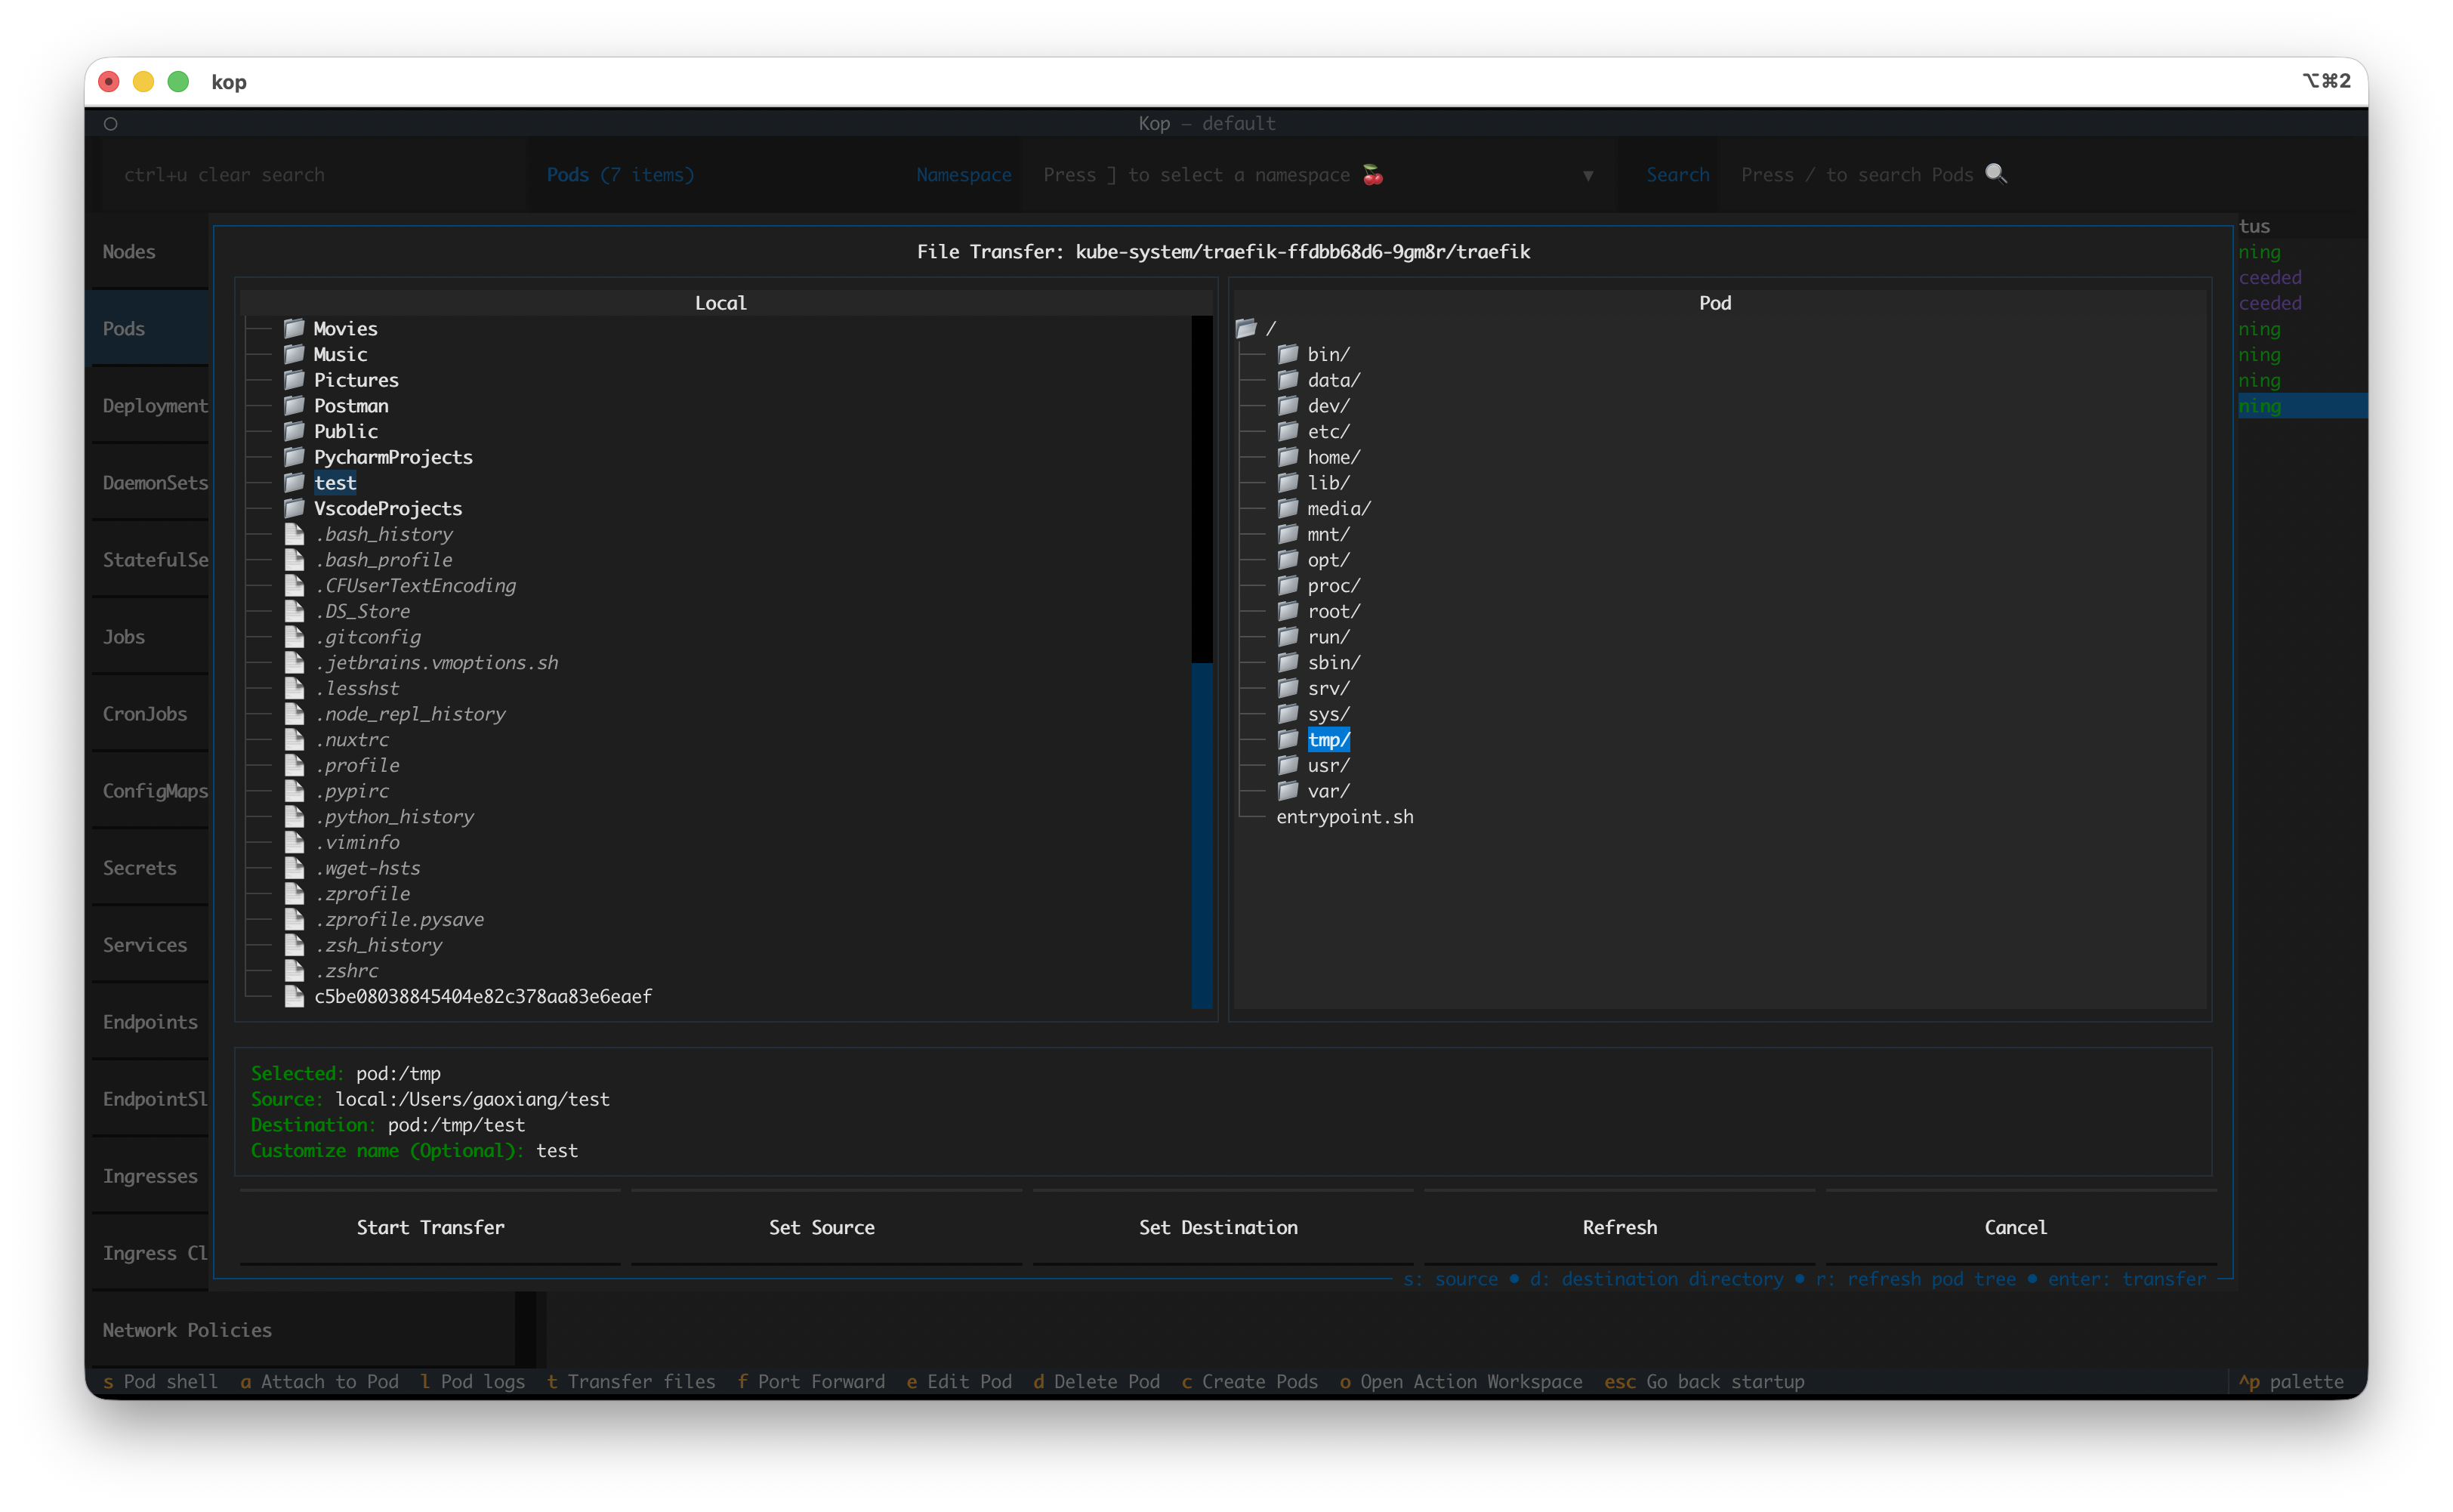
Transfersupports custom target filenames
Port Forward
Forwards a local port to a Pod port so you can access container services from your machine.
Steps:
- Select the target Pod.
- Press
fto open port-forward configuration. - Set local-to-container port mapping and start forwarding.
- Access the service locally through
127.0.0.1:<localPort>.
Notes:
- If the local port is already in use, change the port and try again.
- Port forwarding occupies one session; forwarding ends when the session is closed.
- If no local port is set, a random local port is selected after forwarding starts.
Pod Logs
Views Pod log output for troubleshooting startup failures, runtime anomalies, and business errors.
Steps:
- Select the target Pod.
- Press
lto open the log view. - Use keyword search or scrolling to inspect log content.
Troubleshooting tips:
- If the Pod has multiple containers, confirm you are viewing logs for the target container.
- In the log window, you can select previous-cycle logs and enable log timestamps.
- For issues such as CrashLoopBackOff, check error logs from the most recent startup cycle first.
Pod Logsopens in theAction Workspace.
Pod Shell
Enters a container shell to run commands, suitable for on-site diagnosis and temporary checks.
Steps:
- Select the target Pod.
- Press
sto open a Shell session. - Run troubleshooting commands in the container (for example process, network, or filesystem checks).
Notes:
- The target container must have an available shell (such as
/bin/shor/bin/bash). - In production environments, run mutating commands with caution to avoid impacting live services.